Introduction to Fuel Pump Replacement
The fuel pump is responsible for delivering fuel from the gas tank to the engine at the correct pressure. A failing fuel pump can cause engine stalling, difficulty starting, loss of power, or complete engine failure. Replacing a faulty fuel pump is essential for maintaining your vehicle’s performance and reliability.
This guide provides a step-by-step method to replace a fuel pump, ensuring a safe and effective installation.
1. Signs That Your Fuel Pump Needs Replacement
✅ Engine sputtering or hesitation at high speeds ✅ Sudden loss of power or engine stalls ✅ Difficulty starting the car or extended cranking ✅ Whining noise from the fuel tank ✅ Poor fuel efficiency or decreased performance ✅ Check Engine Light (CEL) related to fuel system codes
2. Tools and Materials Needed
🔧 New fuel pump (Ensure compatibility with your vehicle model) 🔧 Fuel line disconnect tool 🔧 Ratchet and socket set 🔧 Screwdrivers 🔧 Jack and jack stands (if applicable) 🔧 Safety glasses and gloves 🔧 Drain pan or container for excess fuel
3. Steps to Replace a Fuel Pump
Step 1: Safety Precautions
- Work in a well-ventilated area and avoid open flames or sparks.
- Disconnect the battery to prevent electrical sparks.
- Relieve fuel pressure by removing the fuel pump fuse and running the engine until it stalls.
Step 2: Locate the Fuel Pump
- In-tank fuel pumps: Usually accessed through a service hatch under the rear seat or trunk.
- External fuel pumps: Located near the fuel tank or along the fuel line.
Step 3: Drain and Remove the Fuel Tank (If Necessary)
- If your fuel pump is inside the gas tank, use a jack to support the fuel tank.
- Drain excess fuel from the tank using a siphon pump.
- Disconnect the fuel lines, electrical connectors, and mounting straps.
- Lower the fuel tank carefully to access the fuel pump.
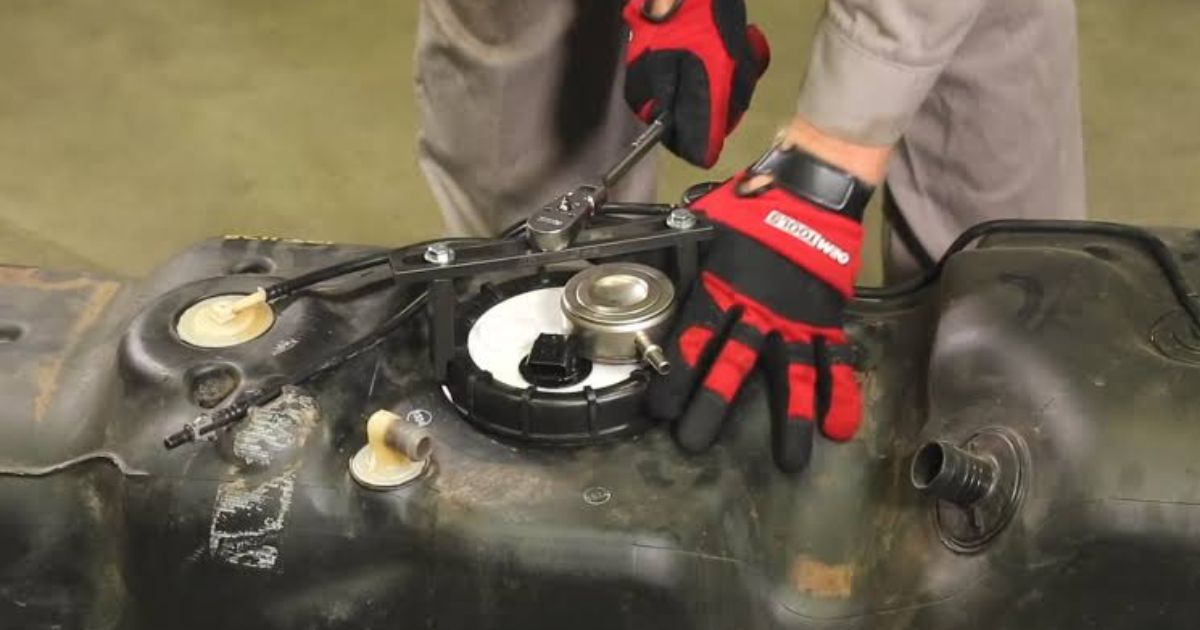
Step 4: Remove the Old Fuel Pump
- For in-tank fuel pumps, remove the retaining ring or screws holding the fuel pump assembly.
- Carefully lift the pump out of the tank, avoiding damage to the fuel level sensor.
- For external pumps, disconnect the mounting bolts and fuel lines.
Step 5: Install the New Fuel Pump
- Compare the old and new pumps to ensure compatibility.
- Replace the fuel filter and fuel pump gasket if necessary.
- Secure the new pump in place and reconnect all electrical and fuel line connections.
Step 6: Reinstall the Fuel Tank (If Removed)
- Carefully lift the fuel tank back into position and secure the mounting straps.
- Reconnect fuel lines, wiring harnesses, and vent hoses.
Step 7: Test the Fuel Pump
- Reconnect the battery and turn the ignition to the ON position (without starting) to prime the fuel system.
- Check for fuel leaks around the pump and fuel lines.
- Start the engine and monitor for smooth operation and proper fuel pressure.
4. Additional Tips for a Successful Replacement
🔹 Use high-quality replacement parts to ensure longevity. 🔹 Check fuel lines and filters for clogs or damage. 🔹 Replace the fuel filter along with the pump to prevent contaminants. 🔹 Ensure all connections are tight to avoid leaks. 🔹 If unsure, consult your vehicle’s repair manual or a professional mechanic.
5. Final Thoughts: Ensuring Reliable Fuel Delivery
A properly functioning fuel pump is crucial for engine performance and fuel efficiency. By following these step-by-step instructions, you can successfully replace your fuel pump and keep your vehicle running smoothly. If you experience persistent fuel system issues, consider having a professional diagnose the problem to avoid further complications.
[…] Halogen bulbs: $15 to $50 per bulb. […]
[…] the new blinker bulb securely into the […]